How To Make A Website
5 min · 977 words
How To Make A Website
It’s been quite a while since I’ve done a blog post, but after I was asked how I make and deploy my website, I thought I’d write up a little something. This post will show you how to serve a static site with firebase and how to link up your own custom domain to it as well.
DISCLAIMER
You should be comfortable with the command line for this tutorial. You’ll need to know how to run a few basic things via the terminal (e.g. cd to change directories) in order to get the most out of this post.
Setting up a Website Project
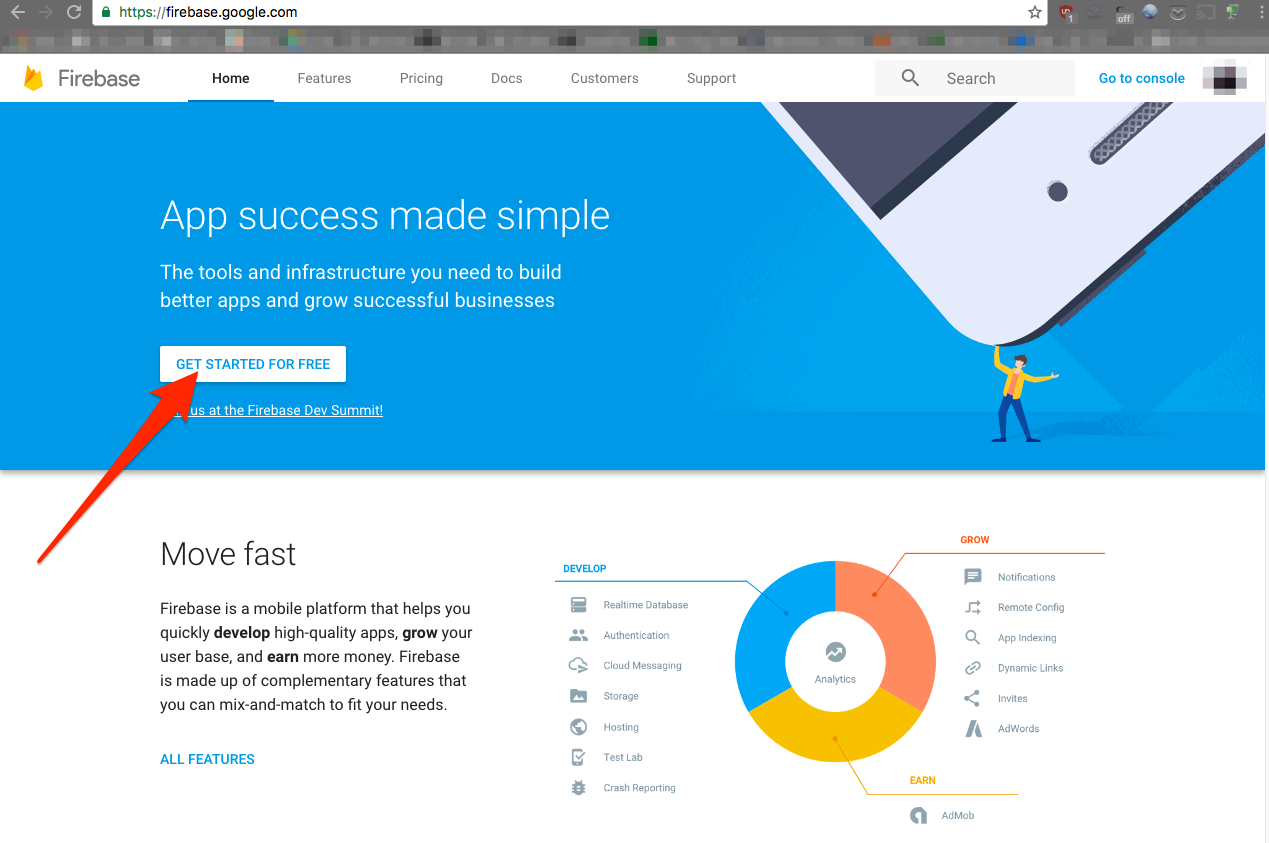
The first thing we need to do is head over to https://firebase.google.com/ and hit the Get Started for Free button
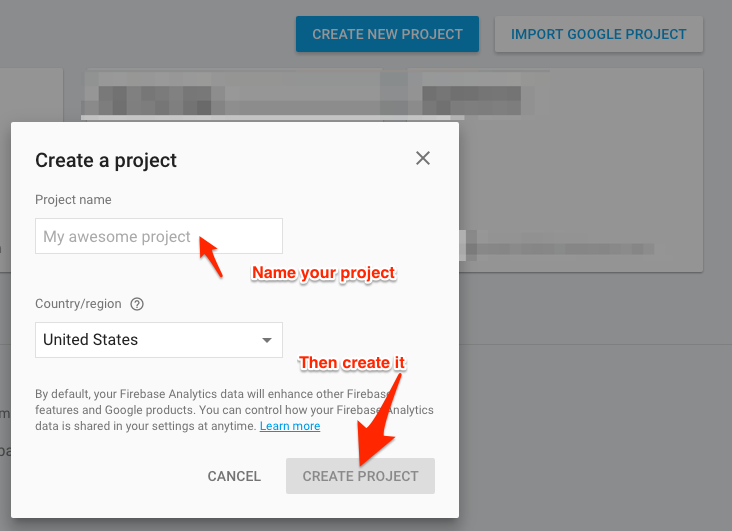
Next thing you’ll want to do is name and create your project.
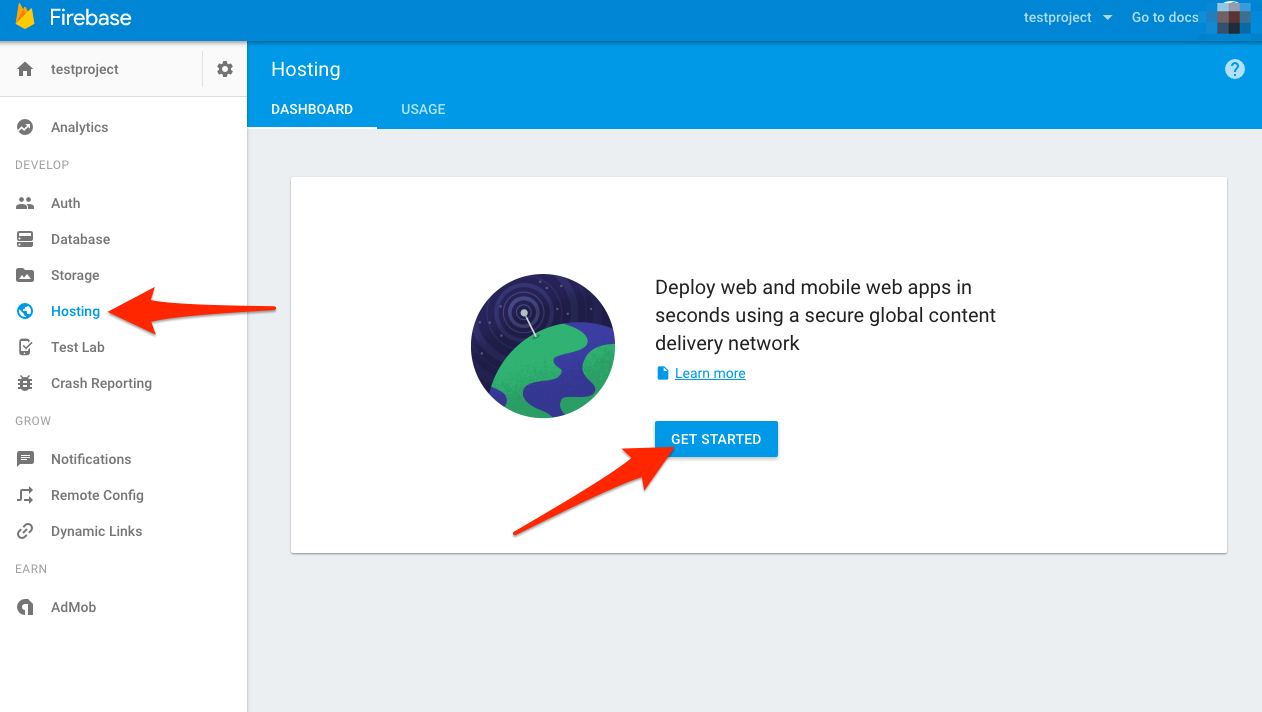
It may take a moment or two, but then you’ll be greeted with a dashboard page. From there, you can select Hosting at the left, then Get Started in the main view.
Now, it’s time to get a bit comfy with your terminal. If you don’t have NodeJS or npm installed, go ahead and grab those from here. I recommend the latest, but the LTS should be fine, too. Once that’s installed, open up a terminal (or cmd.exe if you’re on windows), and run npm install -g firebase-tools from the terminal.

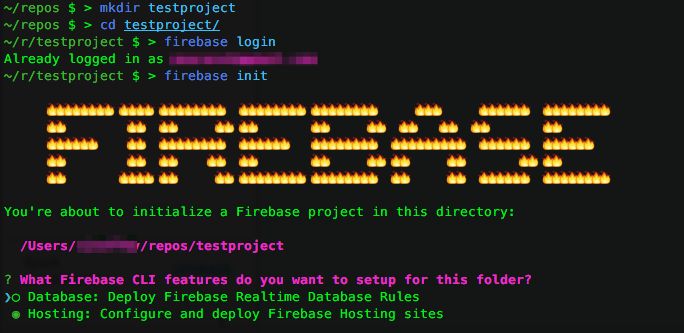
You may want to change directories via your terminal for the next couple of steps. Run the following lines when you’ve done so:
firebase loginto login to your firebase account.firebase initto initialize your website.
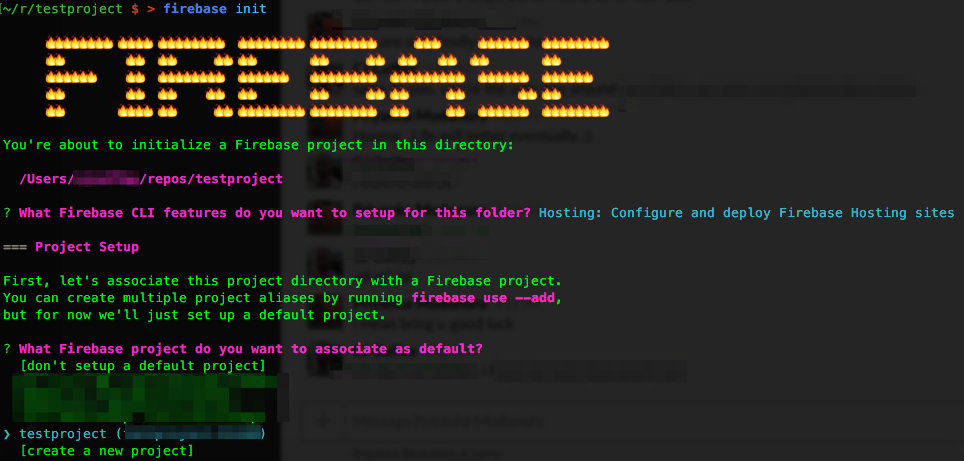
During the init, you’ll see something similar to this
It will ask you which features you’d like to implement for your current project. Since we’re not using any Database things, just hit Space to de-select it from the menu. Press Enter (or Return if you’re on a mac) to confirm. Next, it will ask you which project you want to target. Use the arrow keys to highlight and press Enter to select the project you created a moment ago.
Next, it will ask you if you which directory you want to use to deploy your website (by default, it’s public), and it will also ask you if you want to configure the site as a single-page app. For me, I kept the default public directory and said No to the single-page app, since all of my site is just plain old HTML files kept in a public folder in my project.
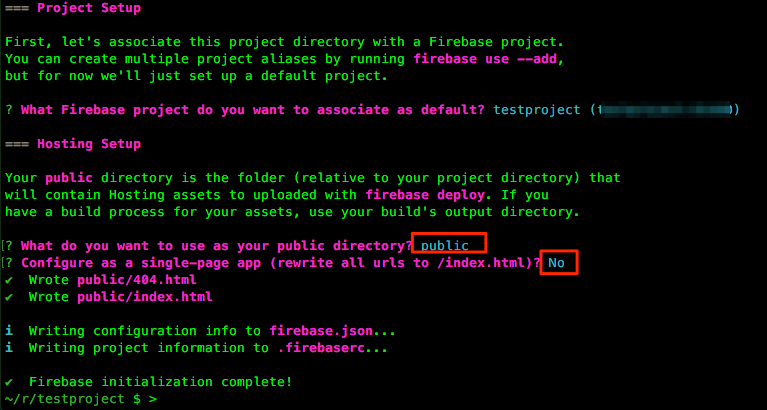
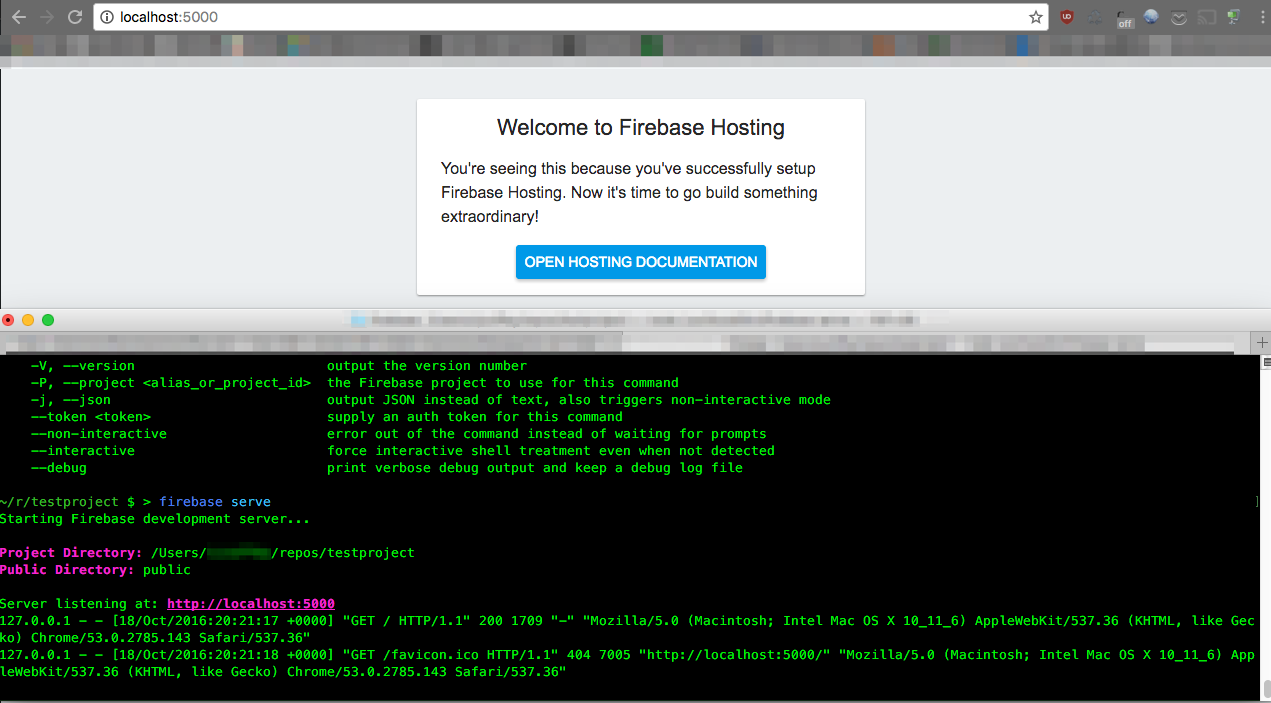
Your terminal should look similar to mine (see above). Hopefully, all of that worked for you. If you like, you can test and see what your site will look like by running firebase serve in the terminal. Here’s what mine looked like.
We can deploy our site by running firebase deploy in the same directory. This will upload your content to your firebase host. You can go back to your firebase dashboard and select Hosting again and see something like this.
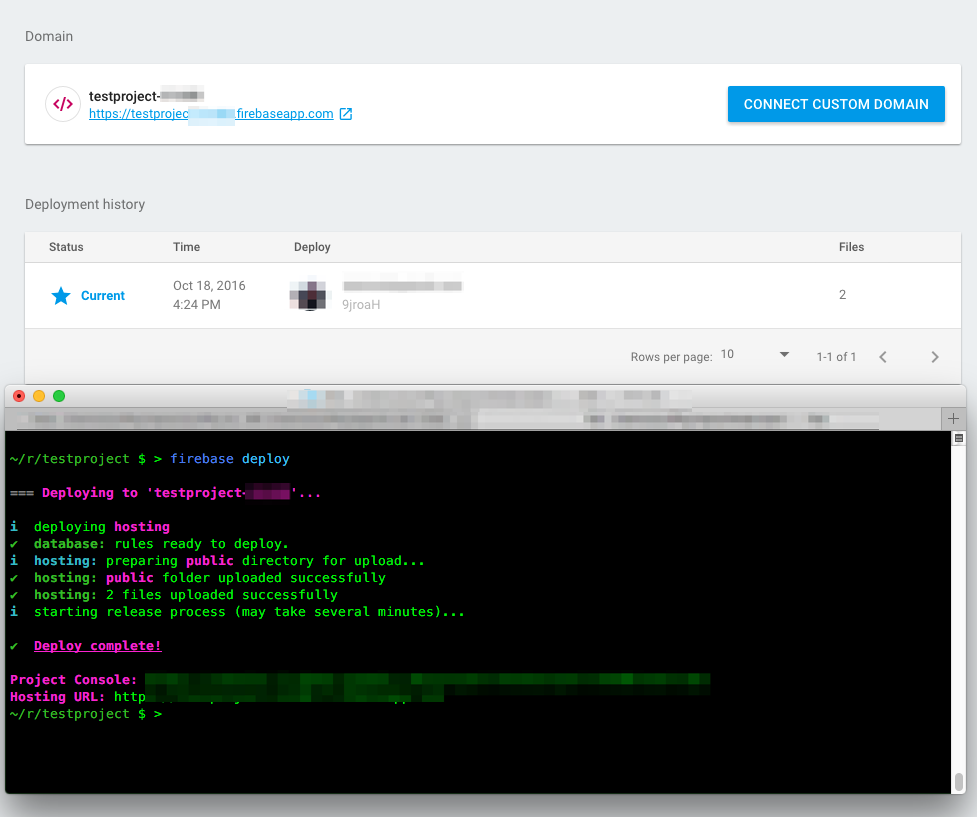
The URL it shows you is your deployed site. You can select that link and it will take you to your site. You can share that link with others and they’ll be able to see the same thing. Neat! You have your very own website now! Give yourself a pat on the back, because you just did the bulk of your work. Now…about that custom domain name…
Setting up your Custom Domain
There are a ton of places to buy a custom domain, but since firebase is Google-based, I figure I’d use Google domains to show how to link up a custom domain. What you’ll see should work just about anywhere (e.g. GoDaddy, Namecheap, etc.), but I’ll be showing screenshots from Google domains since that’s what I’m using. I got mine for $12/year. Perhaps you can get yours for cheaper or whatever, but that’s not the point. Regardless, here we go.
Once you’ve picked out a swag website name, take note of it and go back to your firebase dashboard. The previous screenshot showed a blue button Connect Custom Domain next your your website. Get back to that view and click that button. You’ll see something like this (see below).
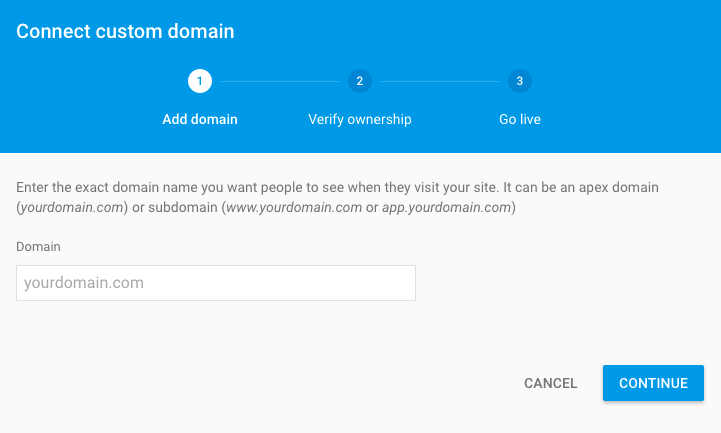
Remember what you called your website? I hope so, because we’re gonna put it in that box you see. Once you’ve done that, click Continue.
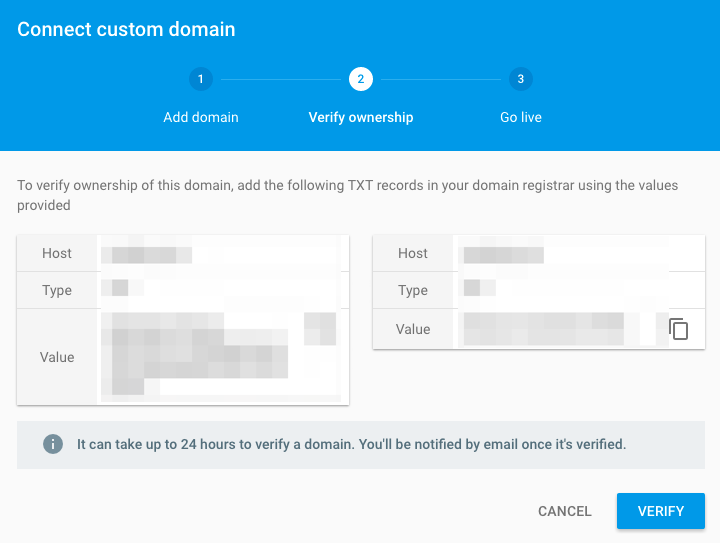
Next, it’ll ask you to verify the ownership of your site. Take note of the records you see.
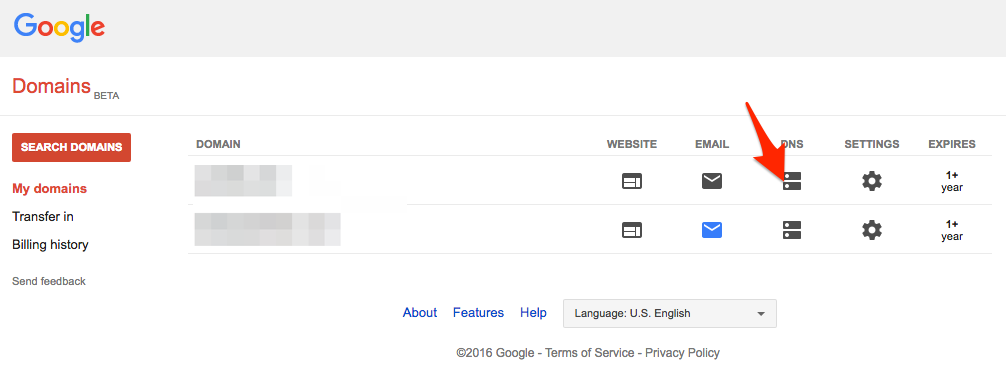
Next, go to your DNS settings for your domain. (If you’re using Google domains, it’ll look similar to this.)
Put in your TXT records in the Custom resource records spot as seen here:
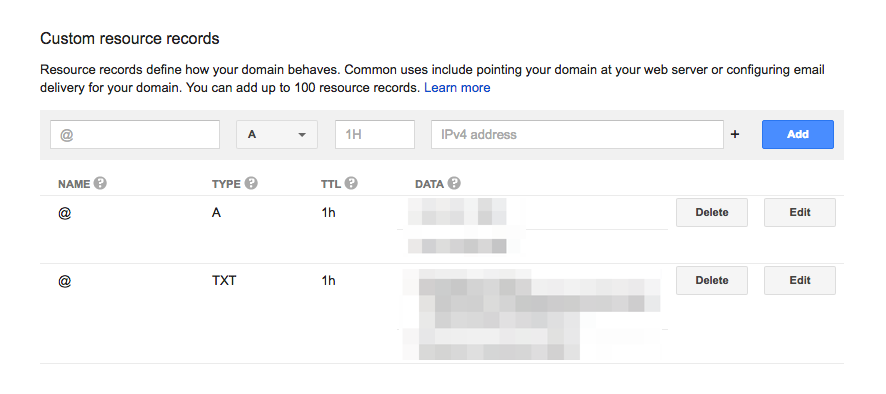
(Disregard the A type record for now, we’ll come back to that.) Select Verify from your firebase window (where you got the TXT records from). Now, you may have to wait a bit for this next part since it says it may take 24 hours to verify or something like that. For me, it was maybe 10 minutes. Hopefully you won’t have to wait so long, but regardless, at some point, firebase should move to step 3 (Go live) and show you something like this.
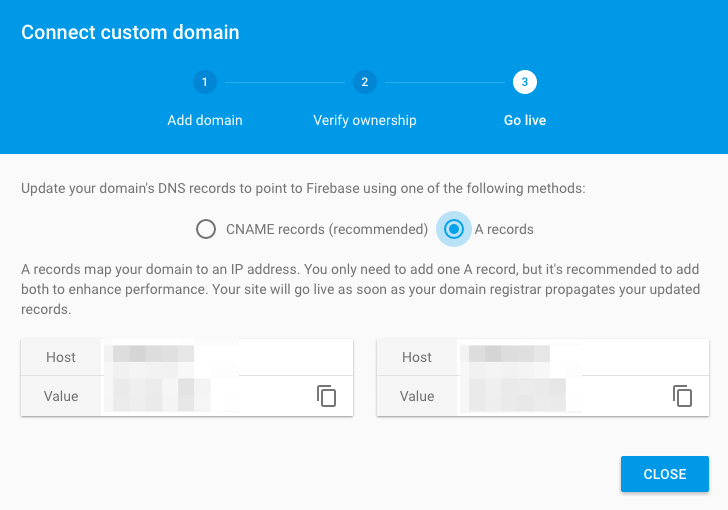
It recommends you to use CNAME records, but I honestly couldn’t get mine to work like that, so A records it is. Copy those records from firebase and go back to your domain’s DNS settings. Insert those records (A or CNAME. If one doesn’t work, try the other).
Annnnnddd you should be good to go. Try out your website now! It should show the same stuff as if you went to your whateverproject-12345.firebaseapp.com URL (not an actual site, probably).
I hope this was helpful. Please let me know what you think in the comments below.